[CI/CD](EN) Usage and example of github actions matrix
Usage and example of github actions matrix
Environment and Prerequisite
- GitHub Actions
Background
- I needed to execute CI/CD with the same tasks but by changing only a few values, so I applied it.
- Detailed usage and examples can be found at https://docs.github.com/actions/writing-workflows/choosing-what-your-workflow-does/using-a-matrix-for-your-jobs.
Usage
- According to the document, you can use it as shown below.
jobs.<job_id>.strategy.matrixis where you define the variables and values for the matrix.- In the example below, the values corresponding to
versionare[10, 12, 14]and the same applies toos.
jobs:
  example_matrix:
    strategy:
      matrix:
        version: [10, 12, 14]
        os: [ubuntu-latest, windows-latest]
Example
If you want to run Jekyll builds on multiple OS, you can write it as shown below. This is a workflow example actually used in this blog.
Code
- This include other steps but just look on
strategyinjobs’sbuild. - Define os on statement
os: [ubuntu-22.04, ubuntu-20.04, macos-latest]and use it onruns-on: ${{ matrix.os }}. - The documentation states that if
jobs.<job_id>.strategy.fail-fastis set totrueor its expression evaluates totrue, GitHub will cancel all in-progress and queued jobs in the matrix if any job in the matrix fails. To allow remaining jobs to continue even if one job fails, I’ve set this tofalse.
name: Jekyll Build CI

on:
  push:
    branches: [ main ]
  pull_request:
    branches: [ main ]
  workflow_dispatch:
    inputs:
      ruby-version:
        required: true
        type: string
        default: "3.2.2"

jobs:
  build:
    name: jekyll build
    strategy:
      matrix:
        os: [ubuntu-22.04, ubuntu-20.04, macos-latest]
      fail-fast: false
    runs-on: ${{ matrix.os }}
    steps:
    - name: Checkout Repository
      uses: actions/checkout@v4
    - name: Setup Ruby
      uses: ruby/setup-ruby@v1
      with:
        ruby-version: ${{ github.event.inputs.ruby-version }}
    - name: Install Bundler
      run: |
        gem install bundler
    - name: Install Dependencies
      run: |
        bundle install
    - name: Build Jekyll Site
      run: |
        bundle exec jekyll build
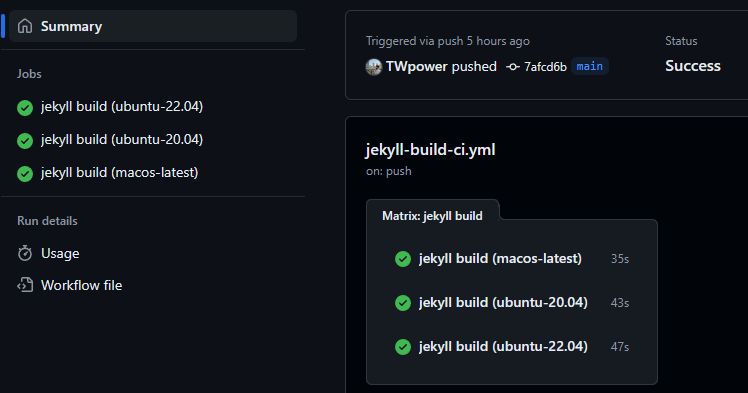
Result
- To make it easier to understand, I’m attaching an image that shows the results of the execution.

