업데이트(2020.05.16): timedatectl 사용법 추가

Linux(Ubuntu)에서 Timezone을 바꿔보자


환경 및 선수조건

  • Linux(Ubuntu 16.04.6)
  • Linux(Ubuntu 18.04.3)
  • Linux(Ubuntu 20.04)


우분투에서 현재 시간 및 날짜 확인하기

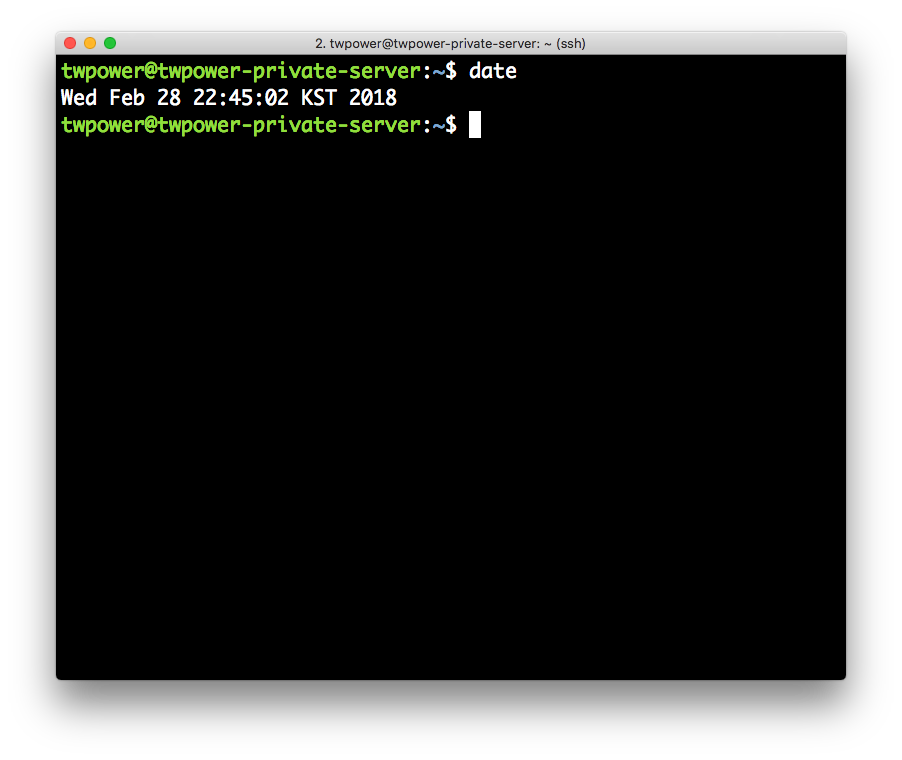
  • 명령어에 date라고 입력하면 됩니다.
$ date

date-command


우분투에서 Timezone 변경하기 - 1

타임존(Timezone) 선택

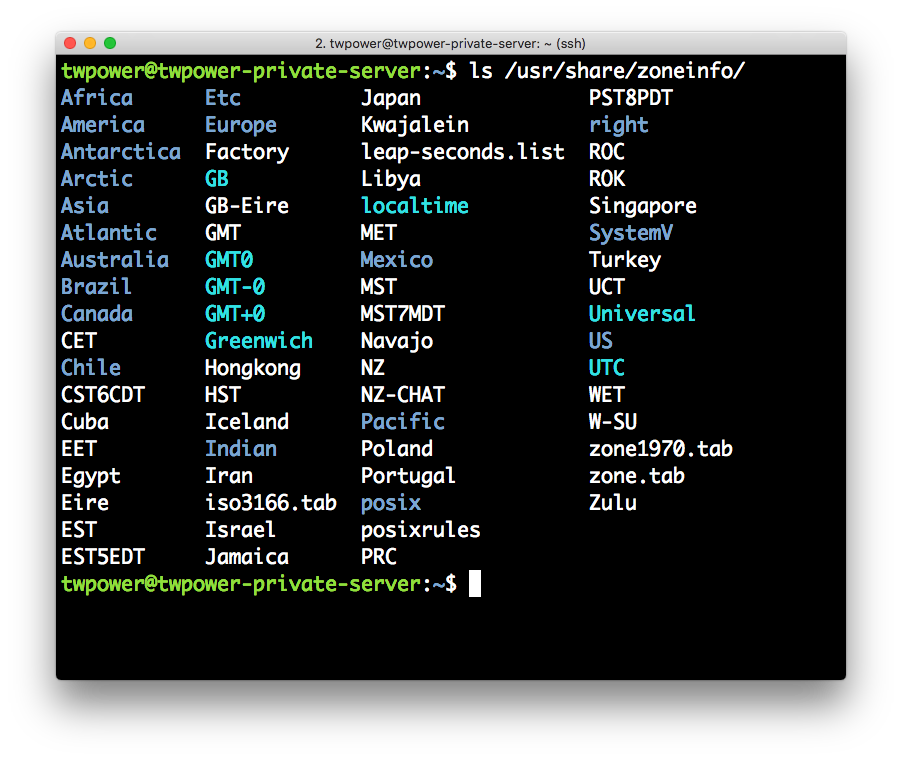
아래에 나오는 /usr/share/zoneinfo/에 보면 대륙과 대륙에 해당하는 국가들이 나와 있습니다. 원하시는 국가를 선택해서 경로를 기억합니다.

zoneinfo


타임존(Timezone) 변경

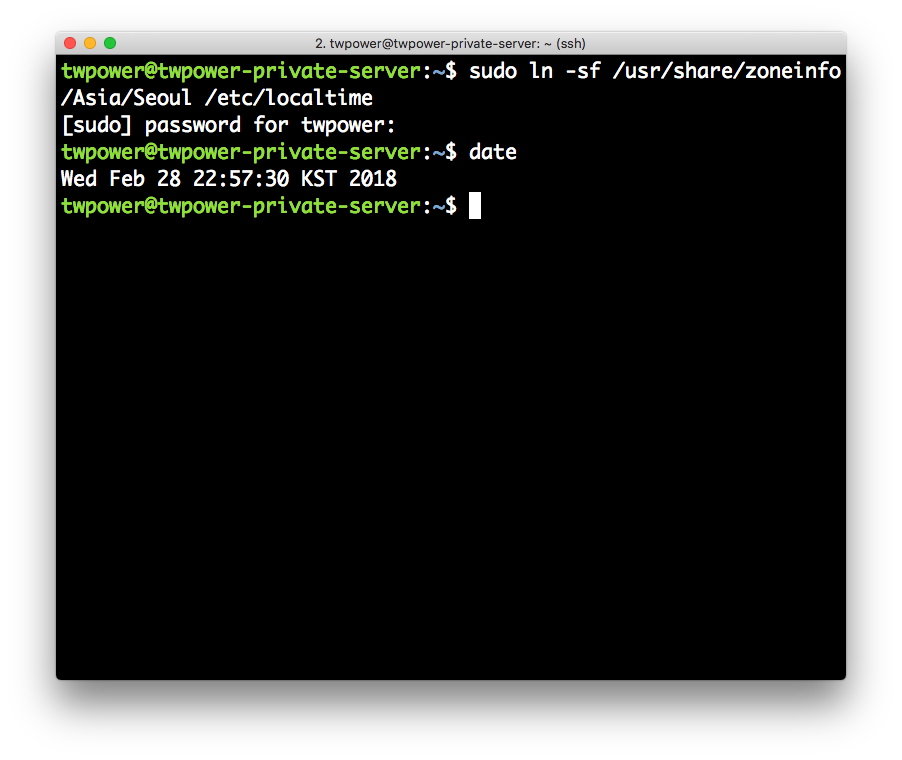
아래는 Asia/Seoul로 변경하는 예제입니다.

$ sudo ln -sf /usr/share/zoneinfo/Asia/Seoul /etc/localtime

seoul-timezone


우분투에서 Timezone 변경하기 - 2

timedatectl

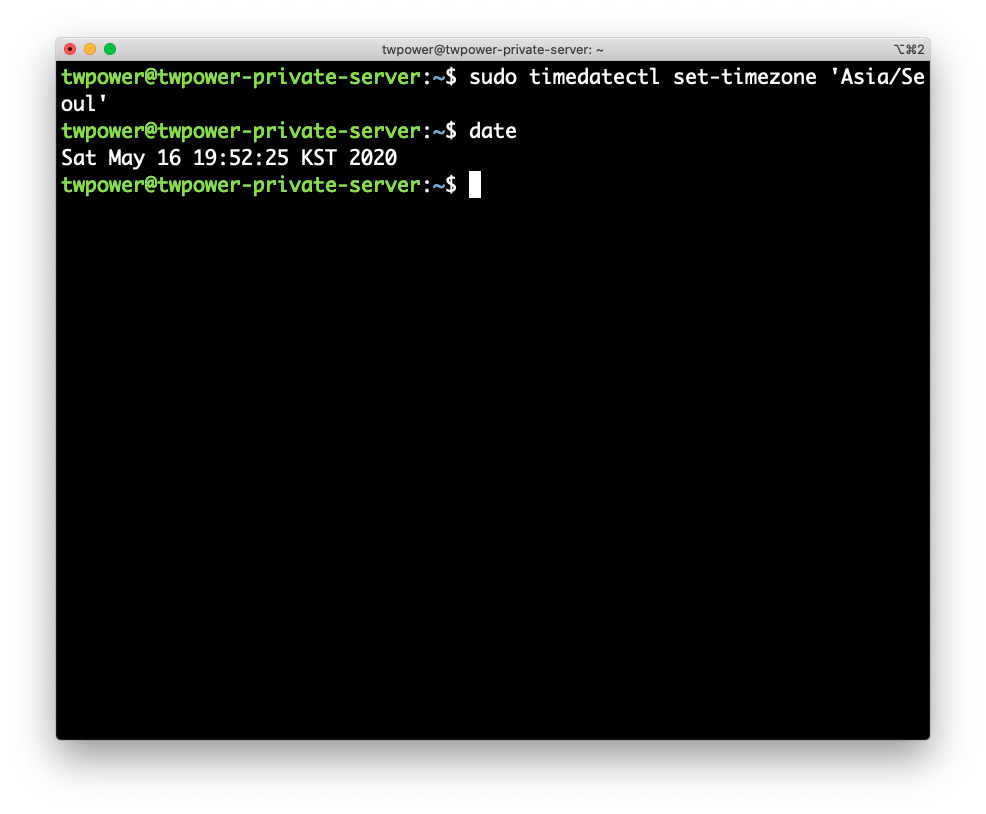
다음과 같이 timedatectl 명령어를 통해 세팅이 가능합니다.

$ sudo timedatectl set-timezone 'Asia/Seoul'
$ date
Sat May 16 19:52:25 KST 2020

timedatectl


우분투에서 Timezone 변경하기 - 3

tzselect

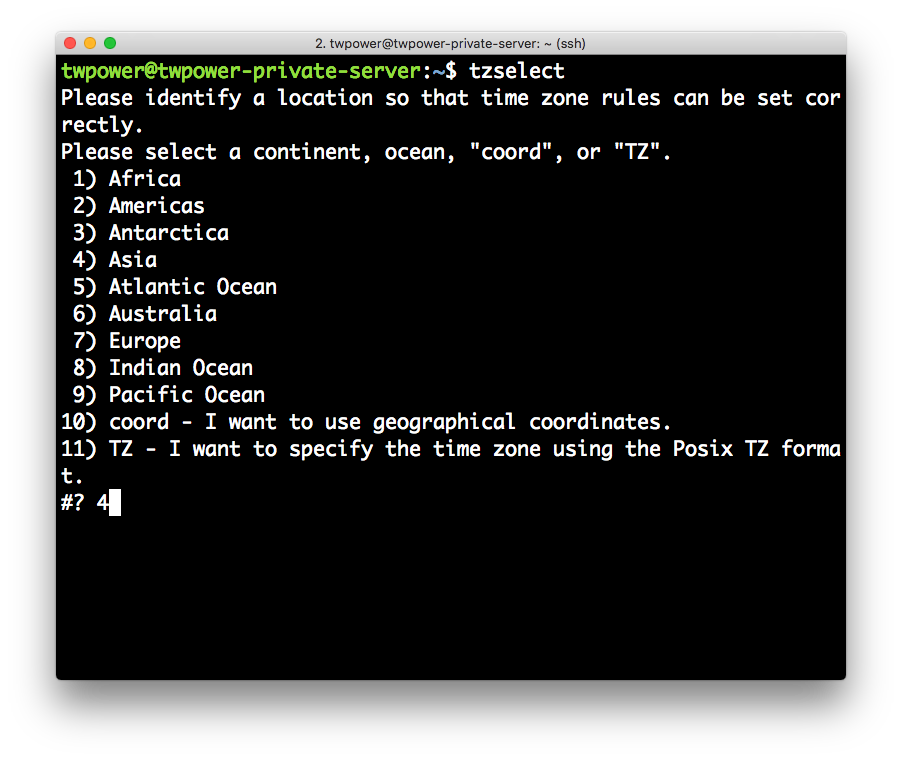
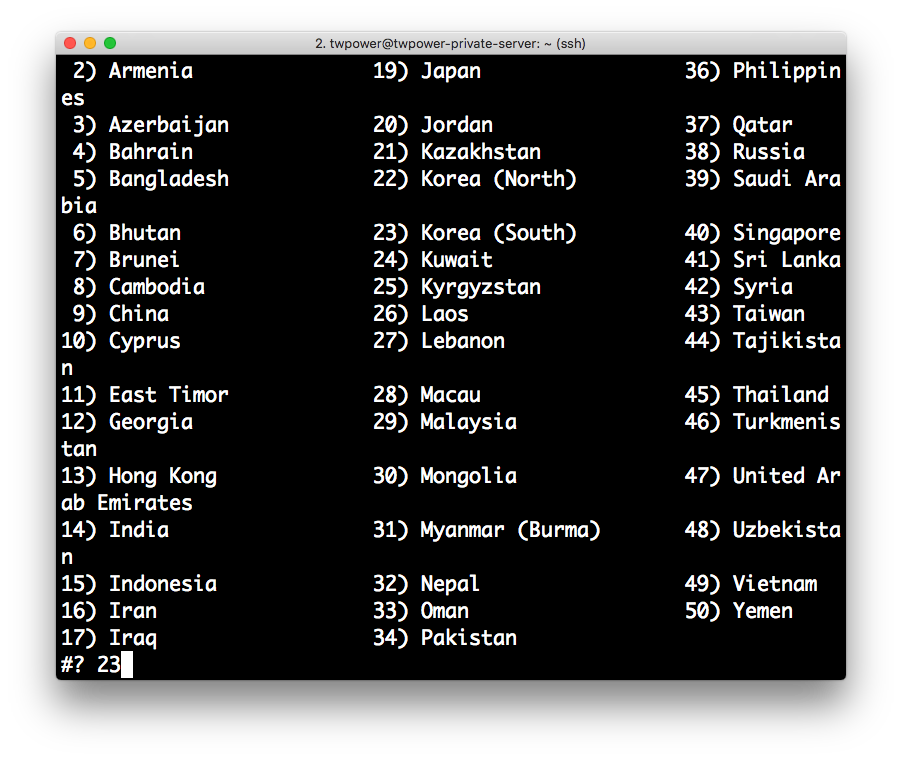
다음과 같이 tzselect 명령어를 통해서 CUI를 통해 세팅이 가능합니다.

$ tzselect

select-continent select-country


타임존(Timezone) 변경

아래는 Asia/Seoul로 변경하는 예제입니다. .profile 파일에 설정 값들을 추가하고 적용합니다.

$ echo "TZ='Asia/Seoul'; export TZ" >> .profile
$ source ~/.profile

select apply


참고자료

Appium을 설치하고 Appium-Python-Client를 이용해 Android를 테스트 할 수 있는 환경을 구축해보자


환경 및 선수조건

  • Python
  • npm
  • Homebrew(for mac), apt-get(for Ubuntu)
  • Android SDK 설치(Android Studio가 설치되어 있어도 무방함)
  • Android AVD(안드로이드 에뮬레이터가 준비되어 있어야 합니다.)
  • Liunx or Mac(이 포스트는 Mac 기준입니다.)


Appium이란?

테스트 환경 구축을 중심으로 하는 포스트라 정리만 간단하게 하고 넘어가겠습니다.

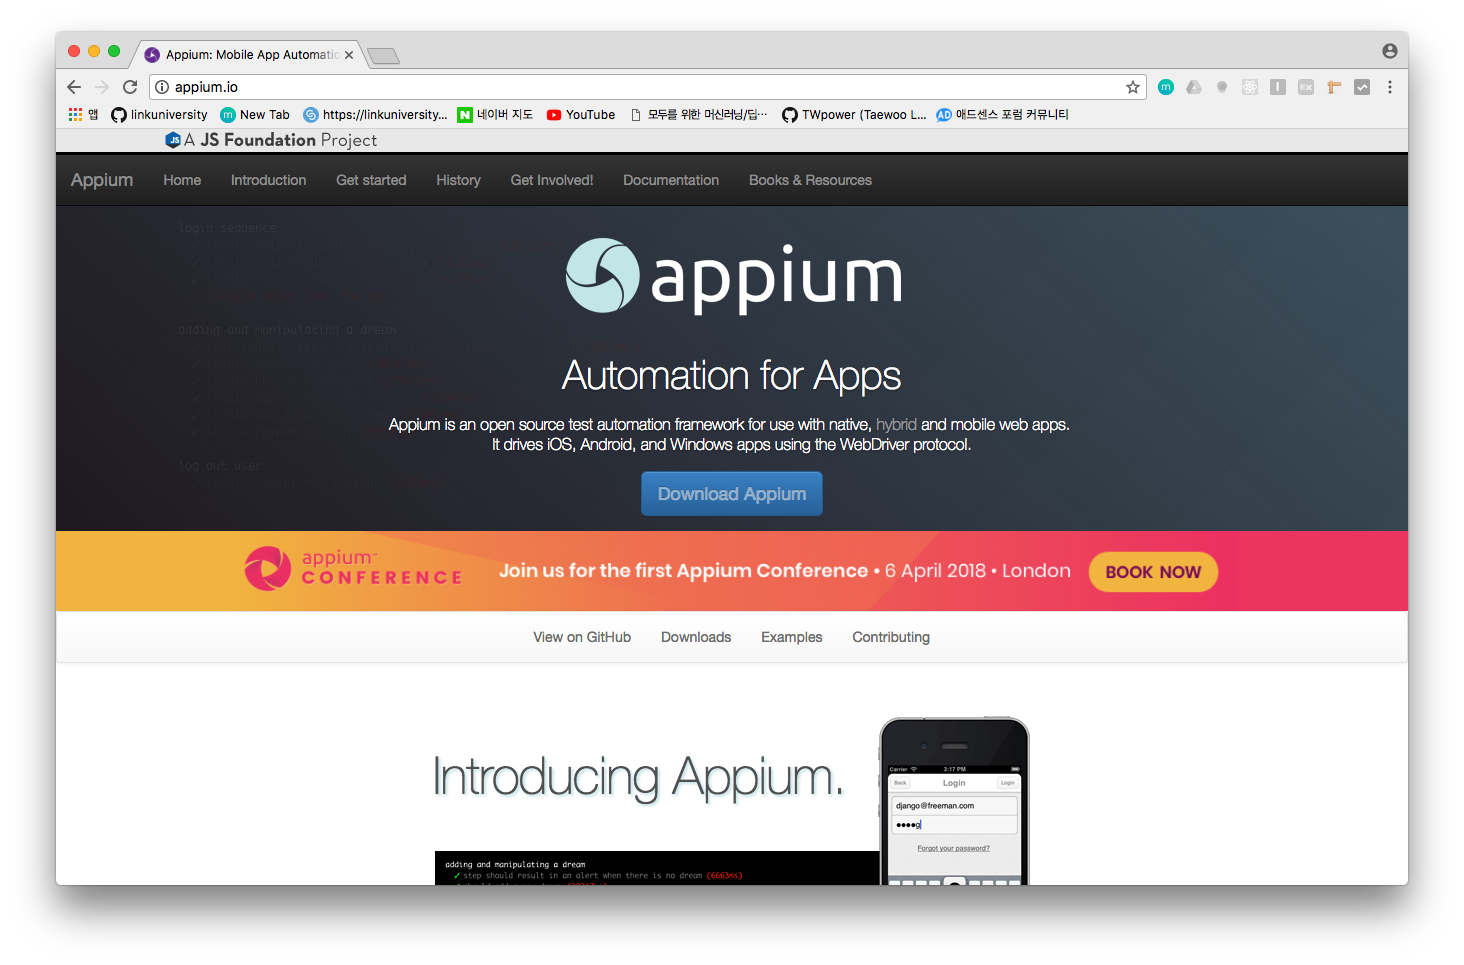
  • Appium이란 네이티브, 모바일 웹 그리고 하이브리드 어플리케이션의 자동화를 해주는 오픈소스 툴입니다.

현재 iOS, Android 그리고 Windows Desktop 플랫폼을 지원하고 있습니다.

동일한 API를 이용해서 iOS, Android에 테스트를 실행할 수 있다고 공식문서에는 나와있는데 아직 직접 실행을 해보지는 않았습니다.(추후 확인 예정)

웹 브라우저 자동화 툴인 Selenium과 같은데 모바일 환경에서 제공해주는거라고 이해하면 쉽습니다.

Importantly, Appium is "cross-platform": it allows you to write tests against multiple platforms (iOS, Android, Windows), using the same API.
This enables code reuse between iOS, Android, and Windows testsuites
appium_homepage


Appium 구조

Appium은 크게 ServerClient의 구조로 되어 있습니다.

  • Server: Appium을 실행하며 REST API를 제공해 Client로부터 요청을 받아서 그 명령어들을 모바일 기기에서 실행하고 다시 그 결과를 Client에게 전달해주는 역할을 합니다.
  • Client: 테스트 혹은 자동화 코드를 작성해서 Server에 요청을 보냅니다. 실질적으로 Client는 요청을 하고 응답에 대한 처리만 하며 자동화나 에뮬레이팅은 Server에서 진행됩니다!

이렇게 구조를 분리함을 통해서 Client는 더 다양한 환경에서 테스트 혹은 자동화 코드를 작성할 수 있고 Server는 클라우드와 같은 여러 환경에서 돌려 볼 수 있습니다.


Appium 설치

이제 Appium을 설치해봅시다. node나 npm 관련해서 나오는 오류는 구글링을 통해서 해결해야 합니다.

npm 및 Node 설치

appium을 설치하려면 우선 npm이 설치되어있어야 하며 없는 분들은 아래 코드를 통해서 설치를 해야합니다.

$ brew install node


appium 설치

이제 npm을 통해서 appium을 설치합니다.

$ npm install appium


appium-doctor 설치

이제 npm을 통해서 appium-doctor을 설치합니다.

appium-doctor는 appium이 설치되고 나서 다른 환경들이(dependency같은 부분들이) 제대로 세팅 되어있는지 확인해도록 하게 도와주는 패키지 입니다.

$ npm install appium-doctor


appium-doctor 실행을 통한 의존성 및 환경 확인

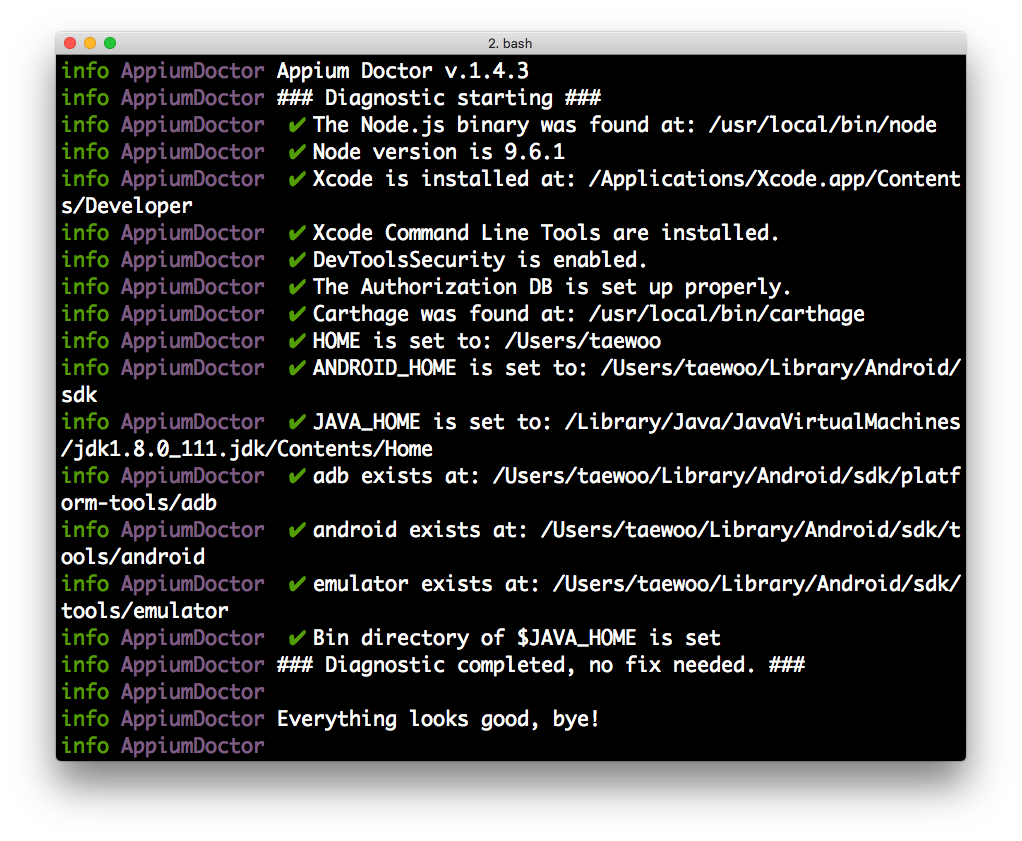
다음 아래 코드를 통해서 appium-doctor를 실행하면 자동으로 의존성 확인을 진행하며 X표시가 난 부분이 있다면 세팅을 해줘야합니다.

$ appium-doctor

저와 같은 경우에는 JAVA_HOME과 ANDROID_HOME의 PATH가 설정이 되어있지 않았는데 설정해주고 나서 아래와 같이 정상 작동 하였습니다.
appium_homepage


Android 가상 머신 열기

Android Stuio를 설치했다면 sdk가 있습니다. appium-doctor를 사용해서 환경을 제대로 설정하셨다면 $ANDROID_HOME/tools/emulator를 통해서 emulator들이 있는 폴더에 접근해주시면 됩니다.

다음 아래 명령어를 통해서 avd 기기가 있는지 확인합니다.

$ $ANDROID_HOME/tools/emulator -list-avds
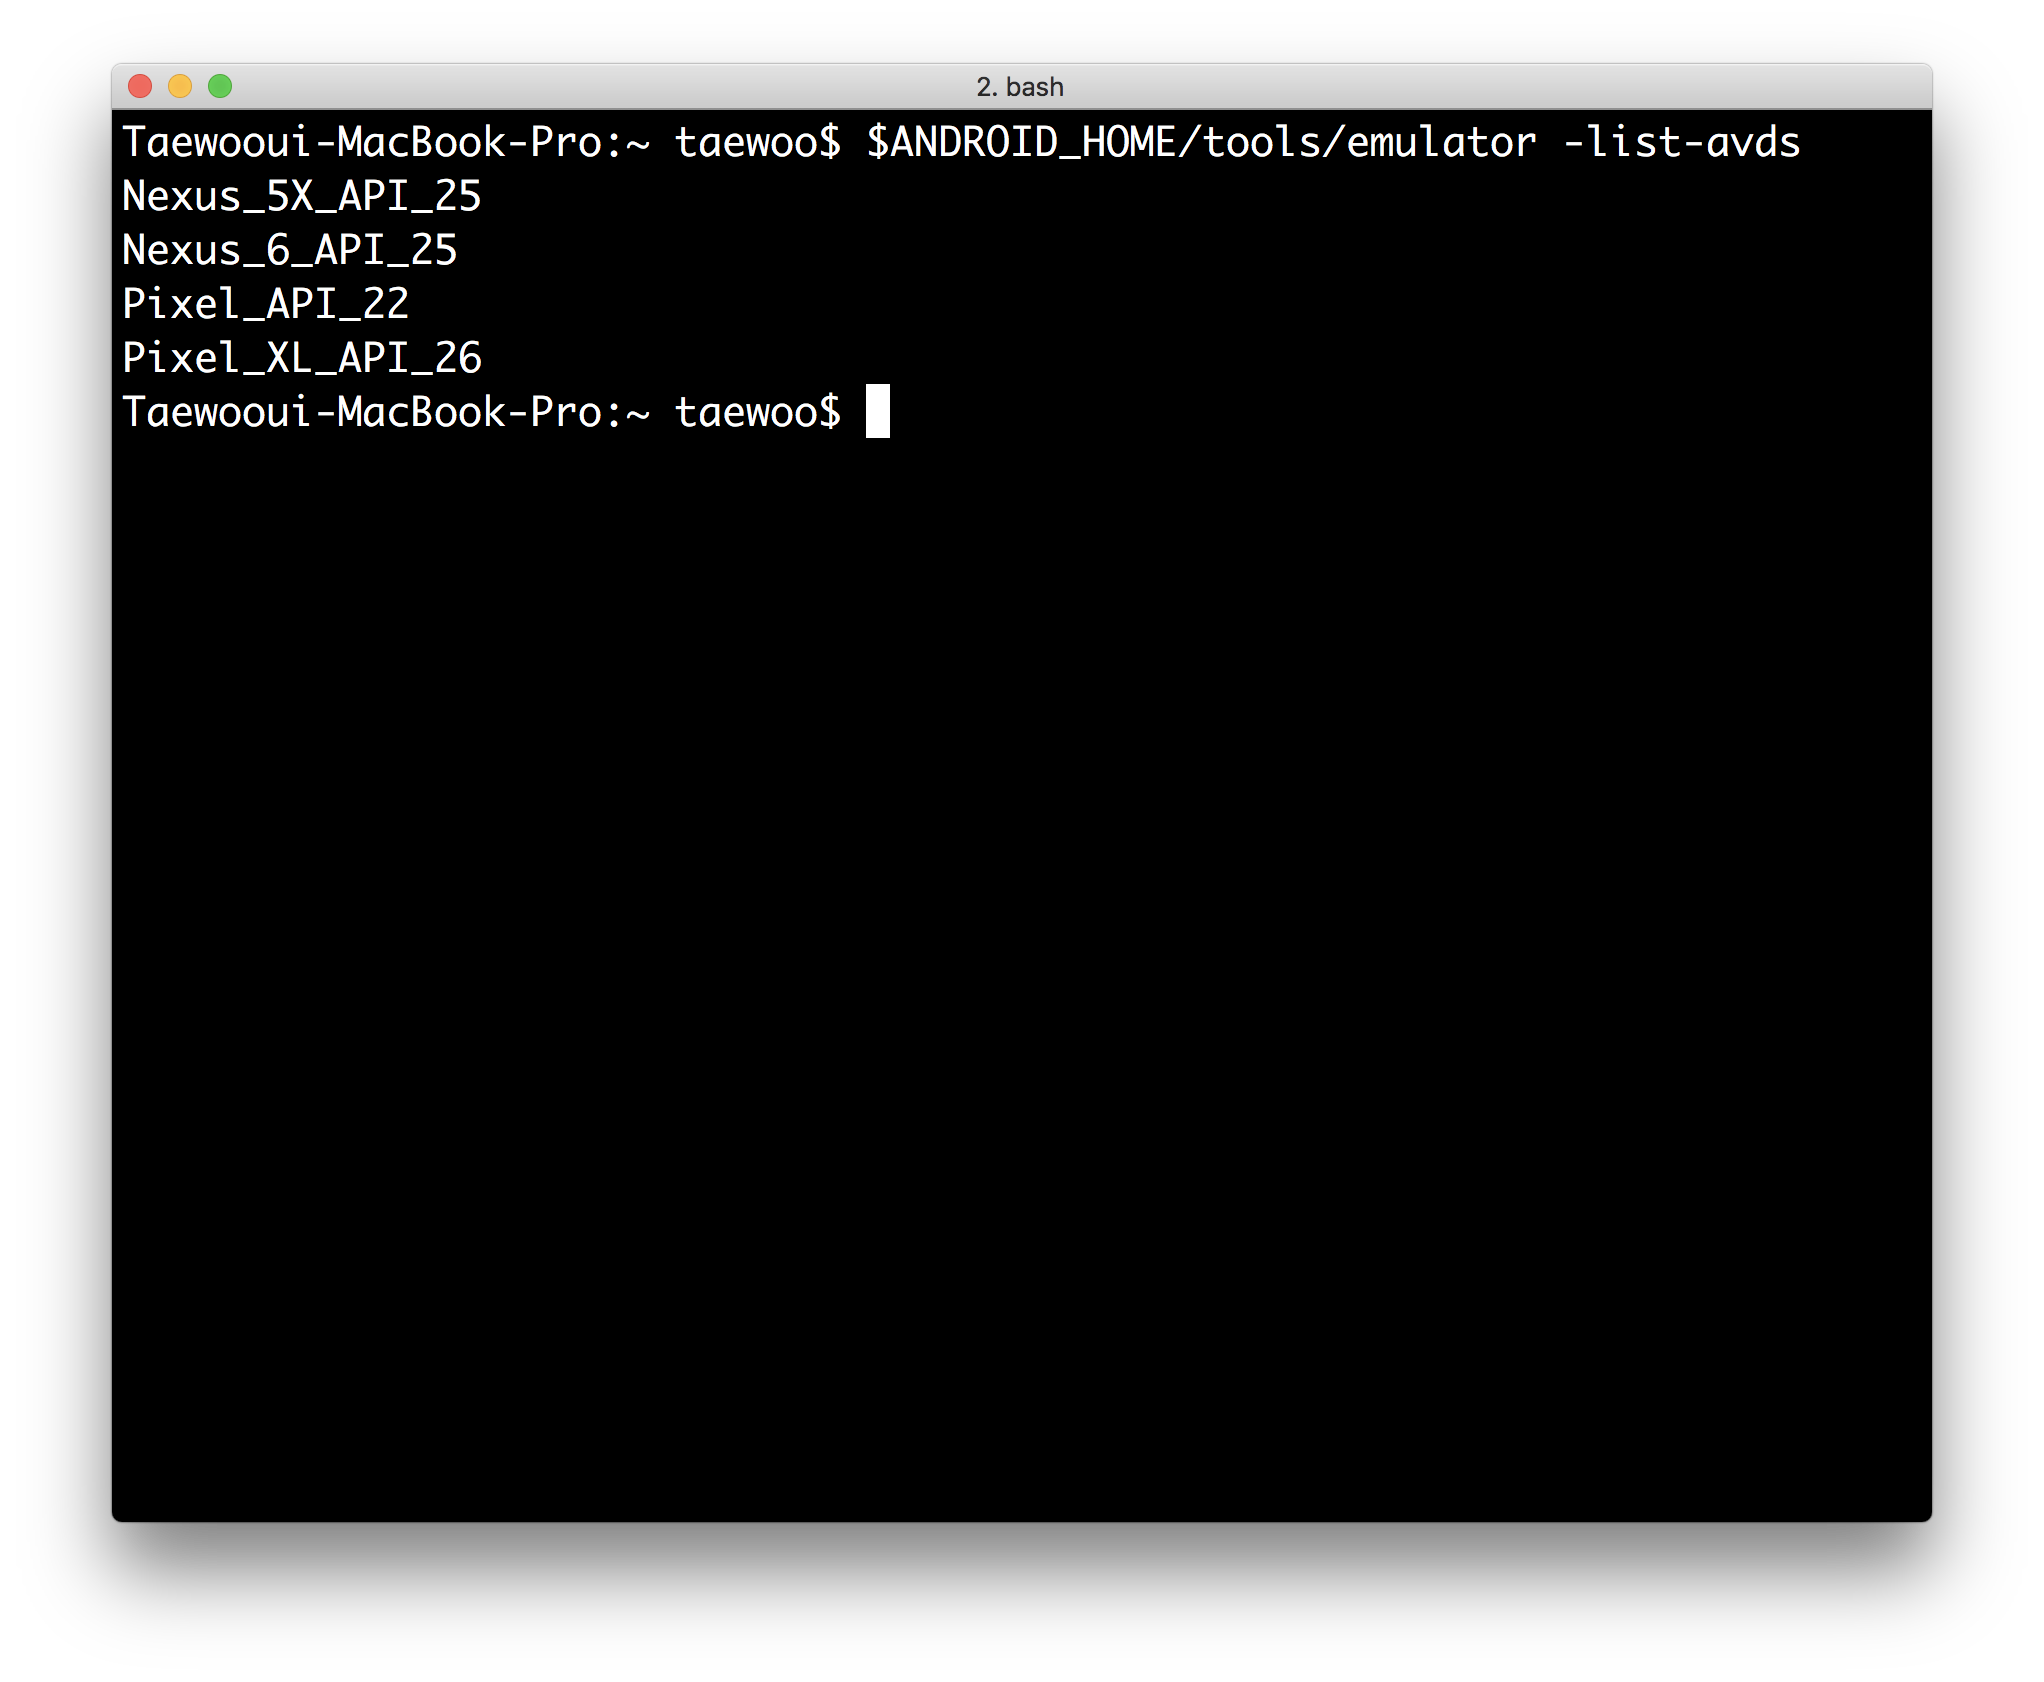
avd-list

만약에 기기가 하나도 없다면 Android Studio를 통해서 avd를 하나 만들거나 Commnad Line을 통해서 생성하시면 됩니다. 가상기기를 생성하는 부분을 여기서는 포스팅하지 않겠습니다.

안드로이드 가상 머신을 하나 생성합니다. 저는 위에 있는 Pixel_API_22를 통해서 해보겠습니다.

아래처럼 명령어를 실행하면 됩니다.

$ $ANDROID_HOME/tools/emulator -avd [avd name]

예시는 아래와 같으며 성공적으로 되면 avd가 나오고 다음 아래와 같은 결과를 출력합니다.

$ $ANDROID_HOME/tools/emulator -avd Pixel_API_22
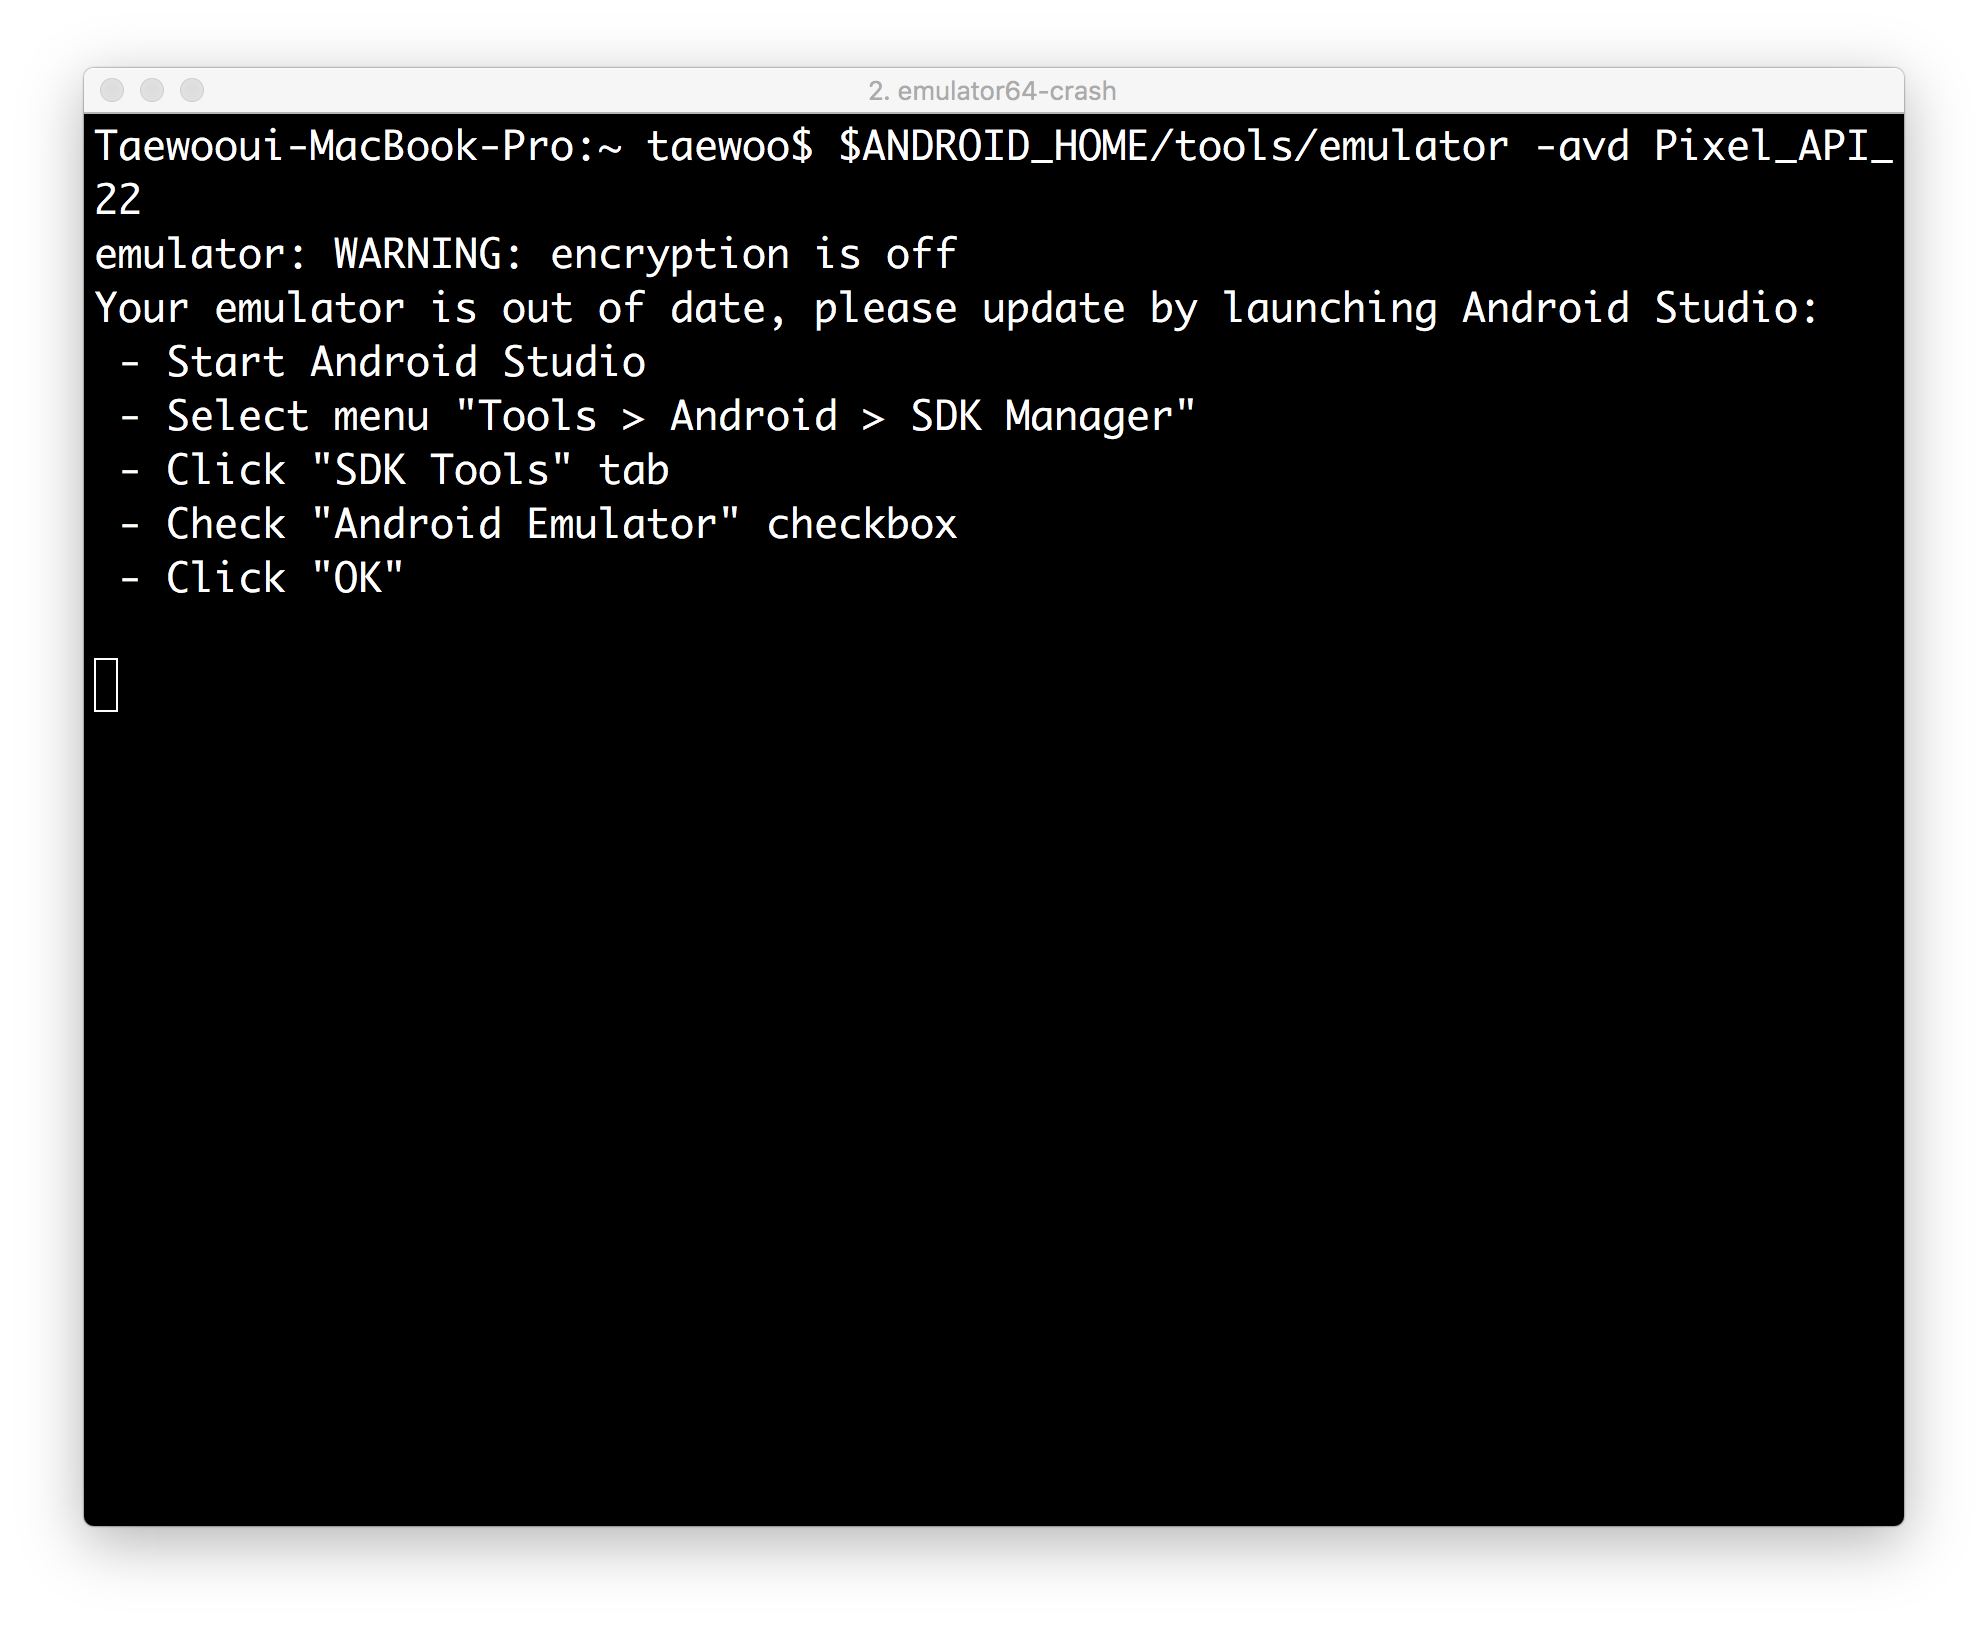
avd-on


Chrome Driver 설치

이제 appium을 실행해주기 위해서는 chrome driver가 필요합니다.

상황에 따라서 컴퓨터에 설치되어 있는 분도 계시고 아닌분들도 계실텐데 Android 버전에 따라서 작동 안하는 부분도 있고 해서 직접 파일을 받아서 실행해보겠습니다.

https://chromedriver.storage.googleapis.com/index.html에서 다운 받을 수 있으며 여기서는 2.33 버전으로 진행하겠습니다.

들어가서 다운로드 하시고 자신의 컴퓨터에 설치된 경로를 기억해줍시다.
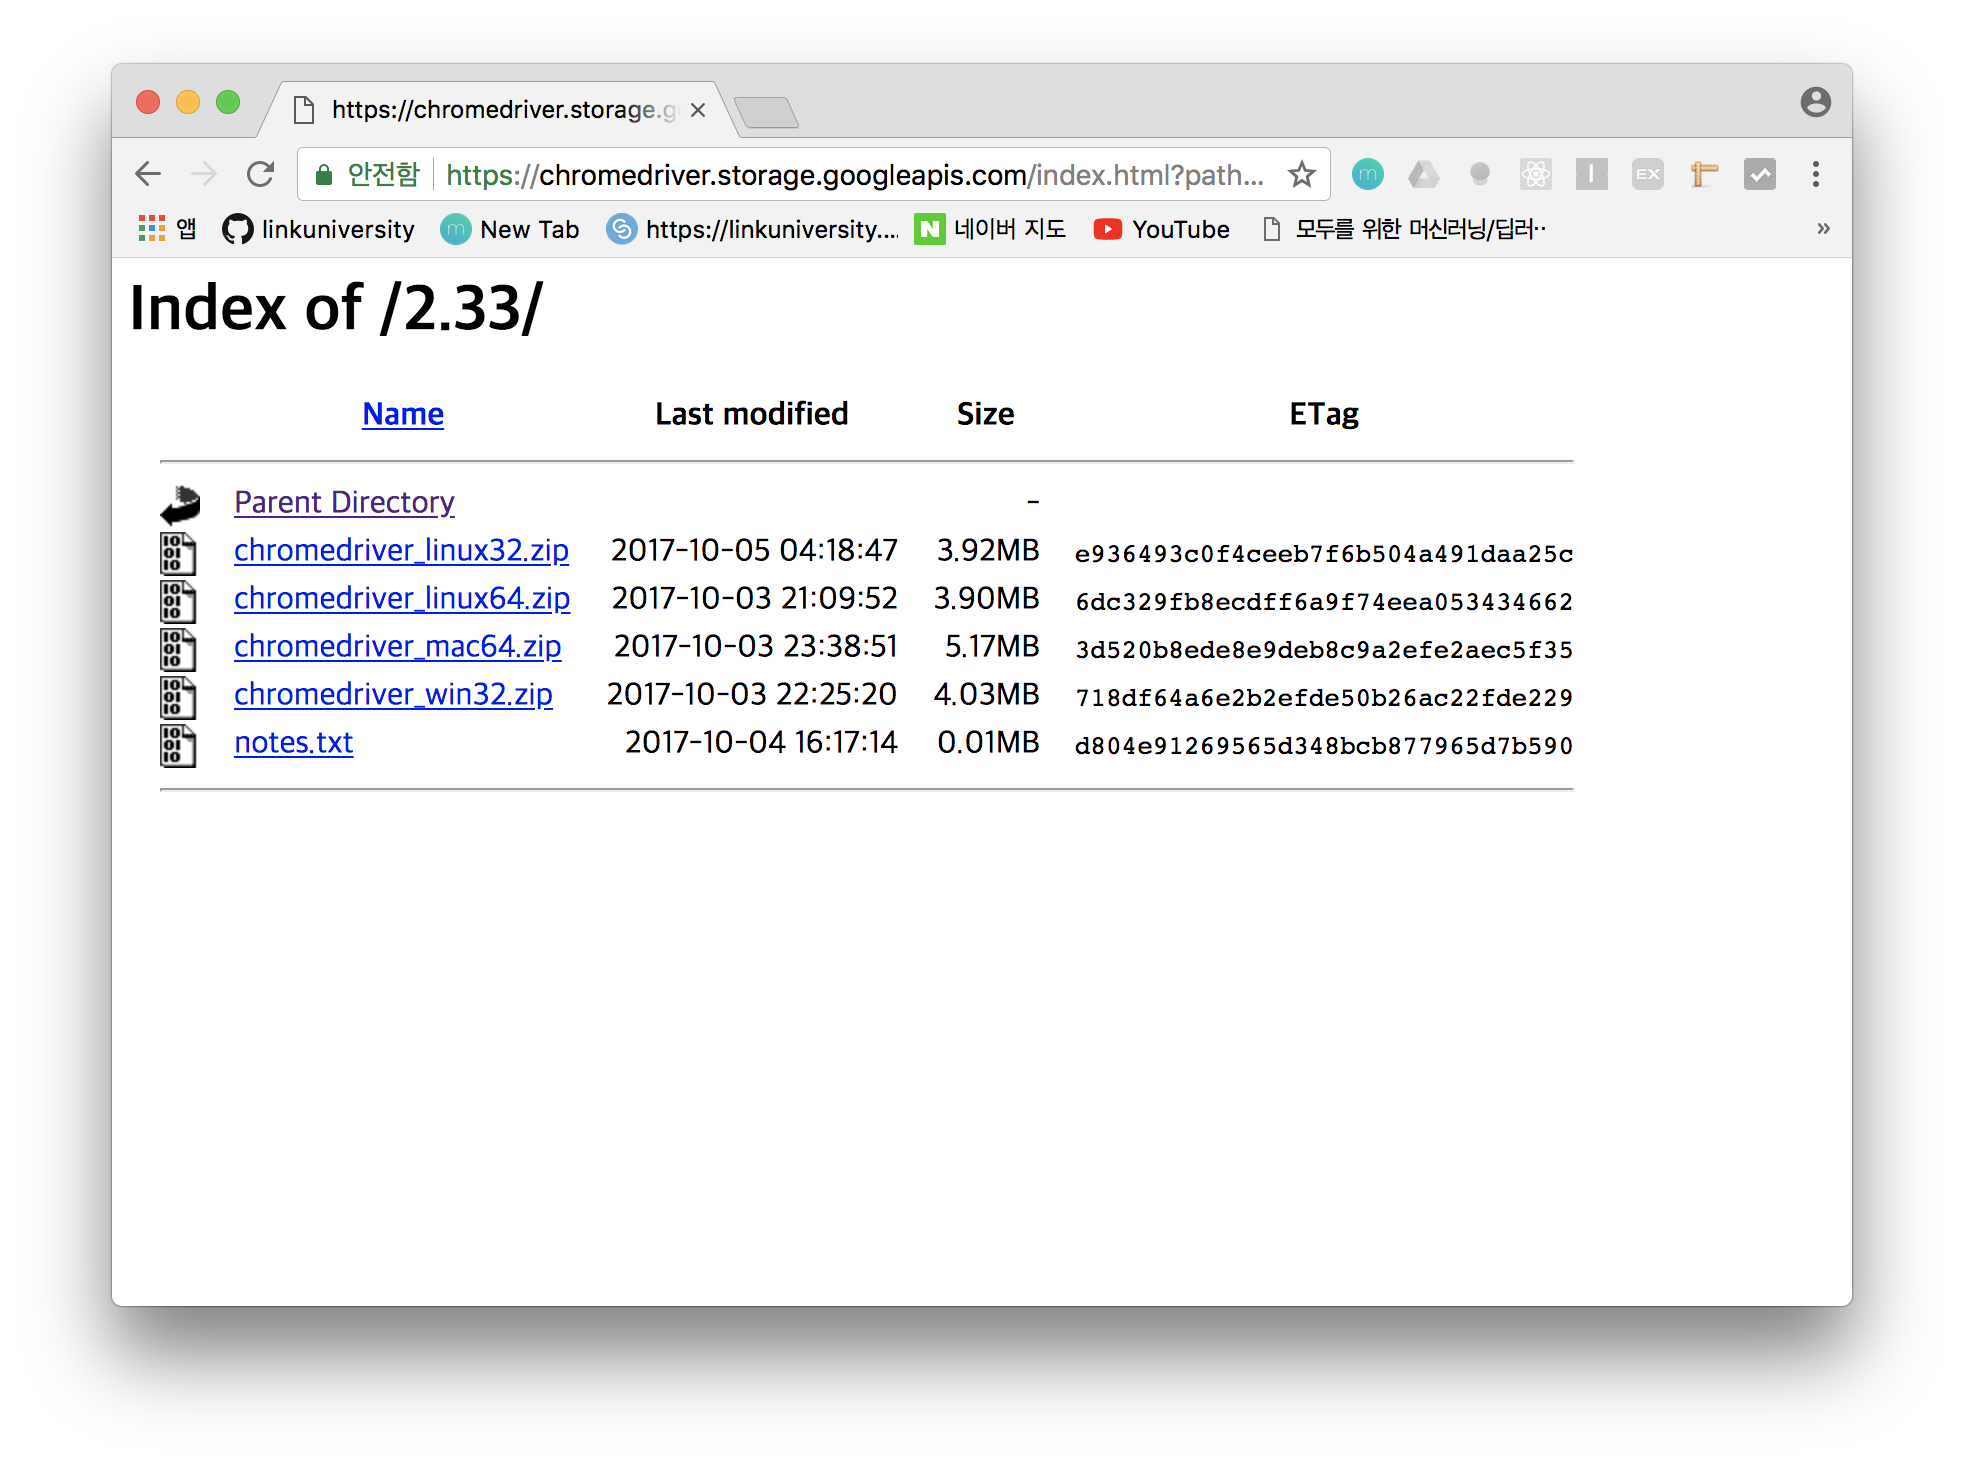
chromedriver-download-link


Appium 실행

다운 받은 chrome driver와 함께 아래의 명령어로 실행해줍니다.

$ appium --chromedriver-executable [Chrome Driver Path]

예시

$ appium --chromedriver-executable /Users/taewoo/Desktop/chromedriver_233
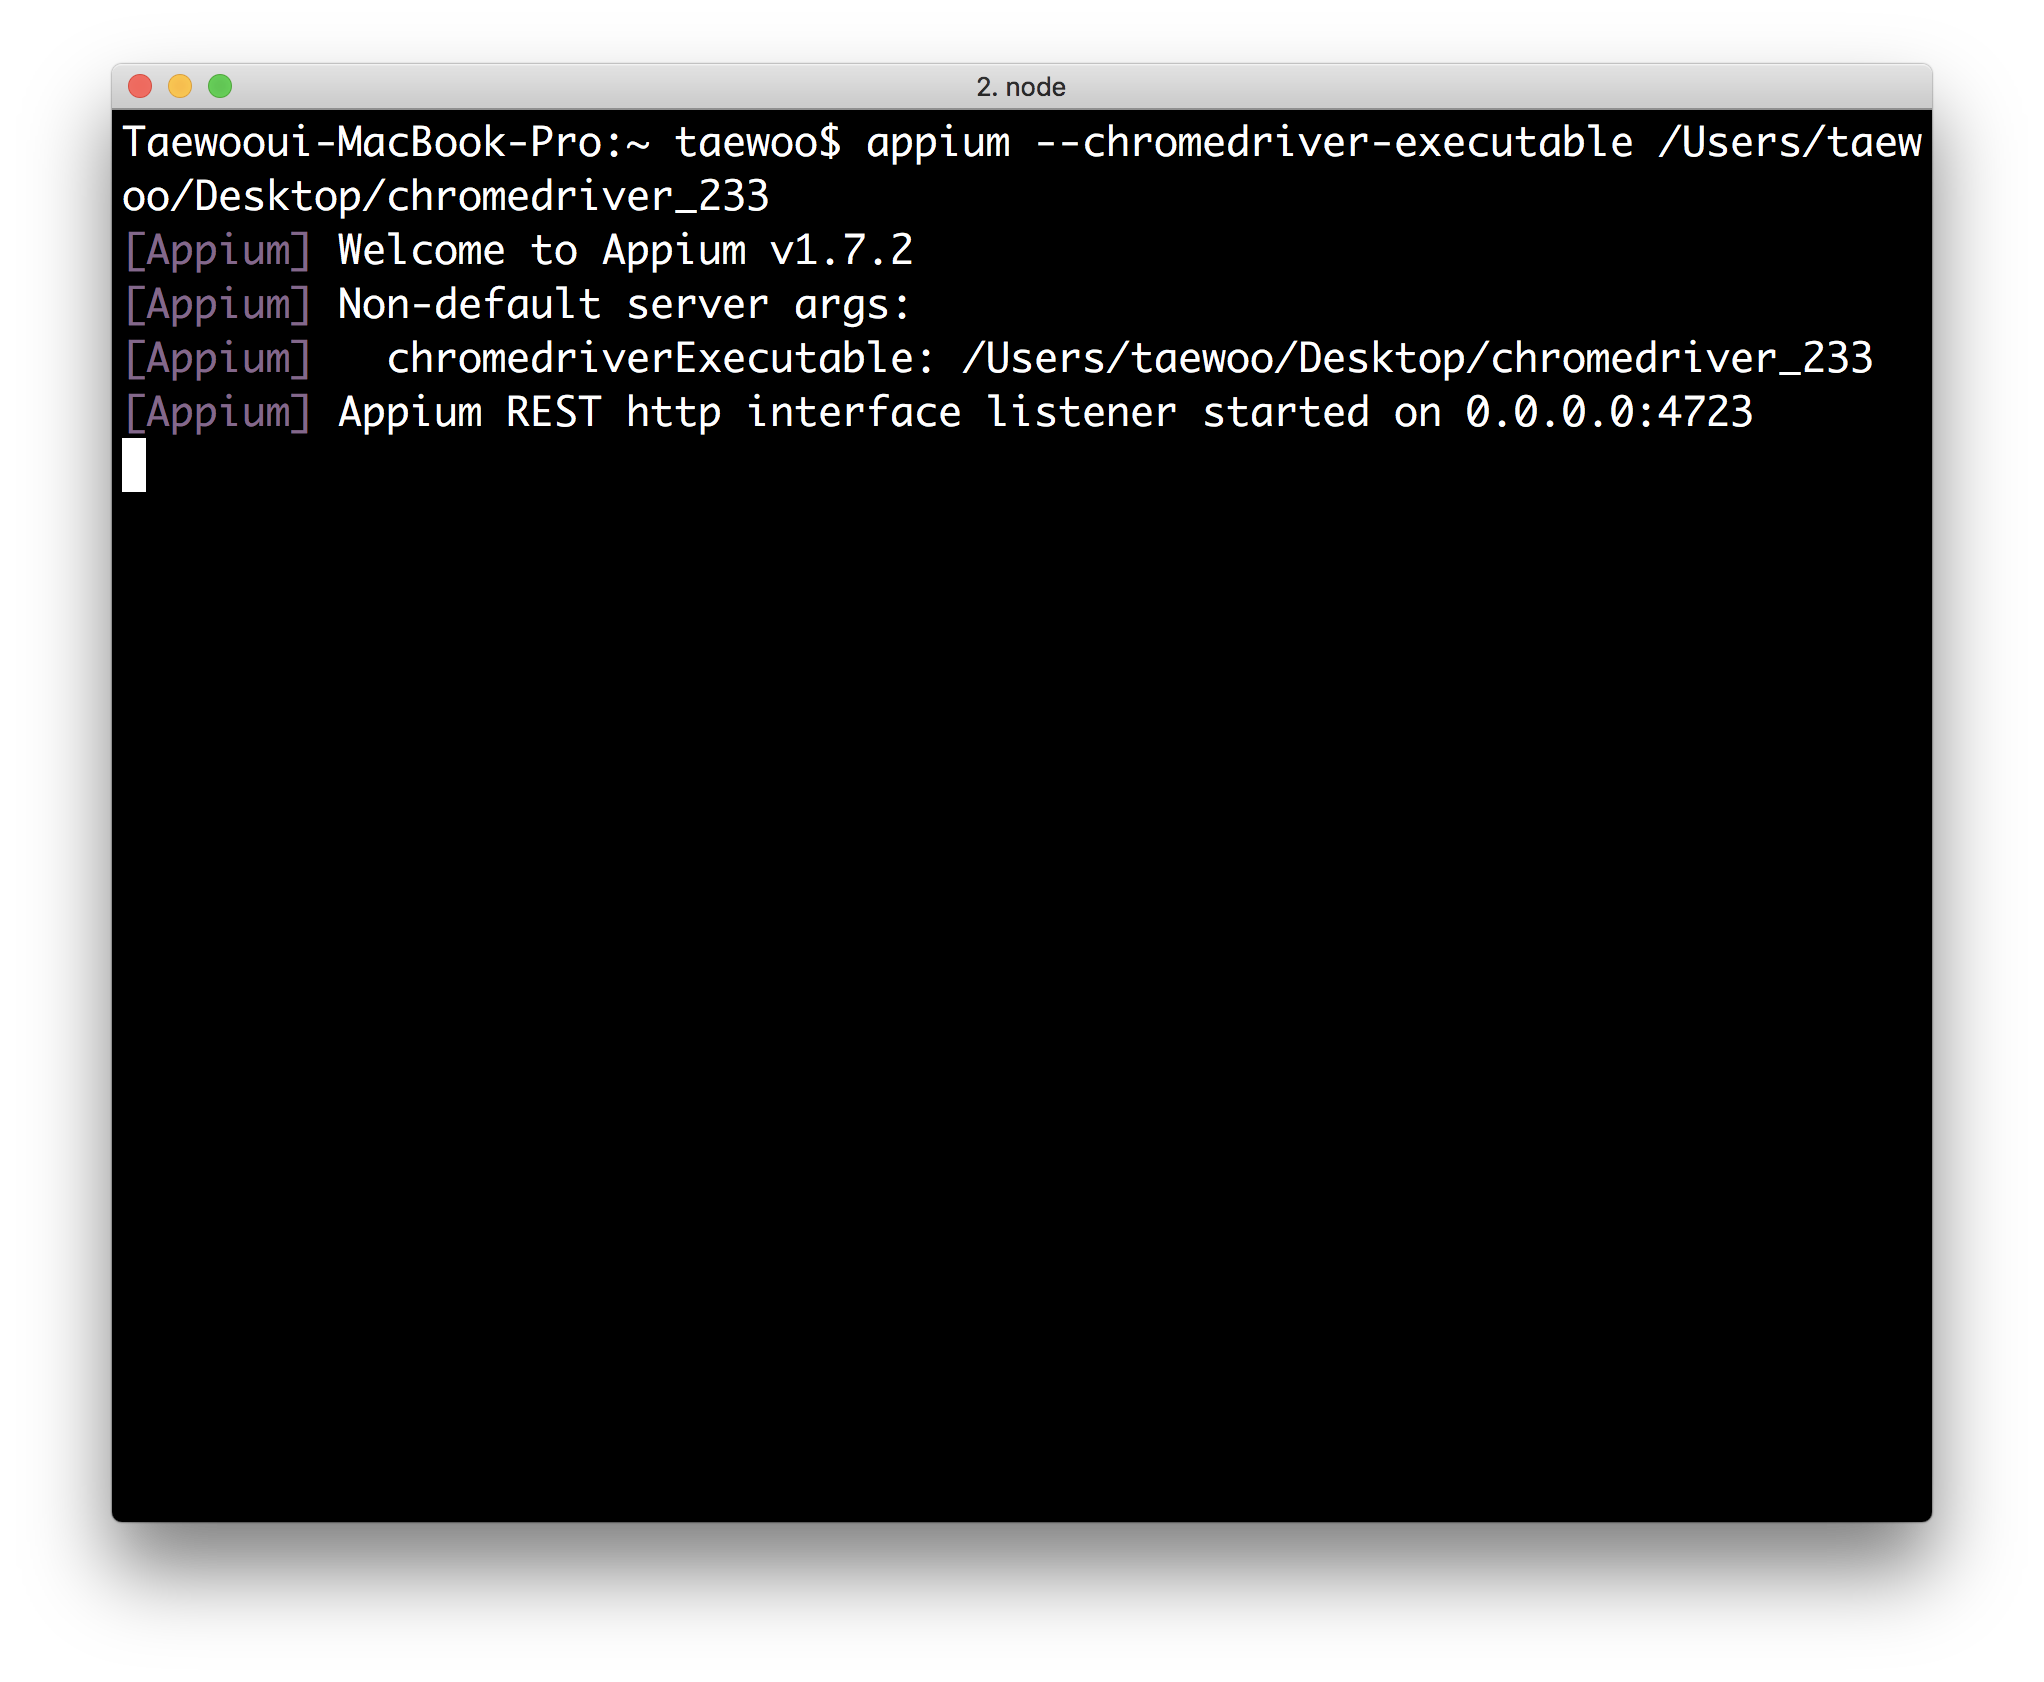
appium-with-chromedriver


Appium Python Client 설치 및 작성

appium/python-client 설치

아래의 명령어를 통해서 pip를 통해 설치합니다.

$ pip install Appium-Python-Client


코드 작성

아래처럼 코드를 작성합니다.

appium_test.py

# Android environment
import unittest
from appium import webdriver

# 아래 필요한 정보들을 기입해 줍니다.
# 안드로이드 버전은 5.1로 하였습니다.
desired_caps = {}
desired_caps['platformName'] = 'Android'
desired_caps['platformVersion'] = '5.1'
desired_caps['deviceName'] = 'Android Emulator'
# 아래 테스트하고자 하는 app의 apk경로를 넣어줍니다.
desired_caps['app'] = '/Users/taewoo/Documents/Unopen.Lab/TWpower/Undang-Android/app/build/outputs/apk/debug/app-debug.apk'

# appium이 돌아가고 있는 서버의 http 주소를 입력해줍니다.
# 현재를 local에서 실행하고 있기 때문에 아래처럼 작성하였습니다.
driver = webdriver.Remote('http://localhost:4723/wd/hub', desired_caps)
# 웹뷰를 가져옵니다.
driver.switch_to.context('WEBVIEW')

# 가볍게 테스트를 해봅니다.
# 테스트 코드는 실행하는 앱에 따라서 다르게 나옵니다!
assert '지금 한강은' in driver.page_source
driver.quit()

실행

$ python appium_test.py


참고자료

C++에서 priority_queue 사용법을 간단하게 알아보자


환경 및 선수조건

  • C++


우선순위 큐 기본 함수

기본형태

  • priority_queue<T, Container, Compare>: 원하는 자료형 및 클래스 T를 통해 생성. 여기서 Container는 vector와 같은 컨테이너이며 Compare는 비교함수 클래스이다.

추가 및 삭제

  • push(element): 우선순위 큐에 원소 추가
  • pop(): 우선순위 큐에서 top의 원소를 삭제

조회

  • top(): top에 있는 원소를 반환

기타

  • empty(): 비어있으면 true 아니면 false를 반환
  • size(): 우선순위 큐에 포함되어 있는 원소들의 수를 반환


구현 코드(Max Heap)

#include <iostream>
#include <functional>
#include <queue>

using namespace std;

int main(){

	// priority_queue
	priority_queue< int, vector<int>, less<int> > pq;
	// or priority_queue<int> pq;


	// push(element)
	pq.push(5);
	pq.push(2);
	pq.push(8);
	pq.push(9);
	pq.push(1);
	pq.push(14);


	// pop()
	pq.pop();
	pq.pop();


	// top();
	cout << "pq top: " << pq.top() << '\n';


	// empty(), size()
	if(!pq.empty()) cout << "pq size: " << pq.size() << '\n';


	// pop all
	while(!pq.empty()){
		cout << pq.top() << " ";
		pq.pop();
	}

	cout << '\n';

	return 0;

}


구현 코드(Min Heap)

#include <iostream>
#include <functional>
#include <queue>

using namespace std;

int main(){

	// priority_queue
	priority_queue< int, vector<int>, greater<int> > pq;


	// push(element)
	pq.push(5);
	pq.push(2);
	pq.push(8);
	pq.push(9);
	pq.push(1);
	pq.push(14);


	// pop()
	pq.pop();
	pq.pop();


	// top();
	cout << "pq top: " << pq.top() << '\n';


	// empty(), size()
	if(!pq.empty()) cout << "pq size: " << pq.size() << '\n';


	// pop all
	while(!pq.empty()){
		cout << pq.top() << " ";
		pq.pop();
	}

	cout << '\n';

	return 0;

}


구현 코드(만든 구조체와 비교함수 이용)

#include <iostream>
#include <queue>

using namespace std;

struct Custom{

	int x;
	int y;
	int value;
	Custom(int value): x(0), y(0), value(value) {
    }
};


// 오름차순 정렬
struct cmp{
    bool operator()(Custom t, Custom u){
        return t.value > u.value;
    }
};


// 아래와 같이 class로도 작성이 가능합니다.
class CompareFunctionObject
{
public:
	int operator()(Custom t, Custom u){
		return t.value > u.value;
	}
};


int main(){

	// priority_queue
	priority_queue< Custom, vector<Custom>,  cmp > pq;

	// 아래는 class 사용시 예제
	// priority_queue< Custom, vector<Custom>,  CompareFunctionObject > pq;


	// push(element)
	pq.push(Custom(5));
	pq.push(Custom(2));
	pq.push(Custom(8));
	pq.push(Custom(9));
	pq.push(Custom(1));
	pq.push(Custom(14));


	// pop()
	pq.pop();
	pq.pop();


	// top();
	cout << "pq top: " << pq.top().value << '\n';


	// empty(), size()
	if(!pq.empty()) cout << "pq size: " << pq.size() << '\n';


	// pop all
	while(!pq.empty()){
		cout << pq.top().value << " ";
		pq.pop();
	}

	cout << '\n';

	return 0;

}


참고자료

C++에서 set 사용법을 간단하게 알아보자


환경 및 선수조건

  • C++


세트 기본 함수

기본형태

  • set<T>: 원하는 자료형 및 클래스 T를 통해 생성

iterator(반복자)

  • begin(): beginning iterator를 반환
  • end(): end iterator를 반환

추가 및 삭제

  • insert(element): 세트에 element를 추가
  • erase(element): 세트에서 해당하는 element를 삭제
  • clear(): 세트에 있는 모든 원소 삭제

조회

  • find(element): element에 해당하는 iterator를 반환
  • count(element): element에 해당하는 개수를 반환

기타

  • empty(): 비어있으면 true 아니면 false를 반환
  • size(): 세트에 포함되어 있는 원소들의 수를 반환

특징

  • 중복을 허용하지 않는다.
  • 중복을 허용하려면 multiset을 사용해야한다.


구현 코드

#include <iostream>
#include <set>
#include <string>

using namespace std;

int main(){

	// set
	set<string> s;


	// insert(element)
	s.insert("abc");
	s.insert("def");
	s.insert("ghi");
	s.insert("jkl");


	// erase(element)
	s.erase("jkl");


	// empty(), size()
	if(!s.empty()) cout << "s size: " << s.size() << '\n';


	// find(element)
	cout << *s.find("abc") << '\n';
	cout << *s.find("def") << '\n';


	// count(element)
	cout << "abc count: " << s.count("abc") << '\n';


	// begin(), end()
	cout << "traverse" << '\n';
	for(auto it = s.begin(); it != s.end(); it++){
		cout << "value: " << *it << '\n';
	}

	return 0;

}


참고자료

C++에서 map 사용법을 간단하게 알아보자


환경 및 선수조건

  • C++


맵 기본 함수

기본형태

  • map<key,value>: key와 value를 pair 형태로 선언합니다.

iterator(반복자)

  • begin(): beginning iterator를 반환
  • end(): end iterator를 반환

추가 및 삭제

  • insert( make_pair(key,value) ): 맵에 원소를 pair 형태로 추가
  • erase(key): 맵에서 key(키값)에 해당하는 원소 삭제
  • clear(): 맵의 원소들 모두 삭제

조회

  • find(key): key(키값)에 해당하는 iterator를 반환
  • count(key): key(키값)에 해당하는 원소들(value들)의 개수를 반환

기타

  • empty(): 맵이 비어있으면 true 아니면 false를 반환
  • size(): 맵 원소들의 수를 반환


구현 코드

#include <iostream>
#include <map>
#include <string>

using namespace std;

int main(){

	// map
	// <string, int> => <key, value>
	map< string, int > m;


	// insert(key,value)
	m.insert(make_pair("a", 1));
	m.insert(make_pair("b", 2));
	m.insert(make_pair("c", 3));
	m.insert(make_pair("d", 4));
	m.insert(make_pair("e", 5));
	m["f"] = 6; // also possible


	// erase(key)
	m.erase("d");
	m.erase("e");
	m.erase(m.find("f")); // also possible


	// empty(), size()
	if(!m.empty()) cout << "m size: " << m.size() << '\n';


	// find(key)
	cout << "a: " << m.find("a")->second << '\n';
	cout << "b: " << m.find("b")->second << '\n';


	// count(key)
	cout << "a count: " << m.count("a") << '\n';
	cout << "b count: " << m.count("b") << '\n';


	// begin(), end()
	cout << "traverse" << '\n';
    // map< string, int >::iterator it; also possible
	for(auto it = m.begin(); it != m.end(); it++){
		cout << "key: " << it->first << " " << "value: " << it->second << '\n';
	}

	return 0;

}


참고자료